Category Archives: Recipes

Cauliflower and Potato Curry

A few days ago I had several gorgeous looking cauliflowers forming and then this happened…..

DSC06152

Having done some research it appears I left it too late to pick them and should have done so when they still looked like the ones you buy. How do you know though? They were tiny. As soon as they start extending like this the quality deteriorates rapidly apparently. I still need to get to the bottom of this….

Undeterred and determined not to waste five cauliflowers, I salvaged what I could and then it was a toss up between cauliflower cheese or potato and cauliflower curry. As we had several of the early potatoes and garlic left that needed to be used up, the curry won. I still have three cauliflowers in the raised bed which have just formed curds so I can make cauliflower cheese with them, even though it looks like I will have to pick them when they are still tiny.

Anyway, we made this last night and were pleasantly surprised at how delicious it was.

Ingredients (serves 4):

  • 2 tbsp vegetable oil
  • 2 large onions chopped
  • large piece of ginger, grated. We used a piece about 2 inches long.
  • 3 garlic cloves, finely chopped
  • 1/2 tsp turmeric
  • 1 tsp ground cumin
  • 1 tsp curry powder
  • 400g can chopped tomatoes
  • 1/2 tsp sugar
  • 1/2 tsp salt
  • 1 cauliflower cut into florets
  • 2 potatoes, cut into chunks
  • 1 small green chilli, chopped
  • squeeze of lemon juice
  • chopped coriander to garnish

Method:

  1. Heat the oil in a saucepan. Cook the onion for 10 mins until soft, then add the ginger, garlic, turmeric, cumin and curry powder. Cook for 1 min more. Stir in the tomatoes and sugar. Add the cauliflower, potatoes and chilli, seasoning to taste. Cover with a lid and gently cook for a good 30 mins, stirring occasionally, until the vegetables are tender.
  2. When the vegetables are cooked, stir in a squeeze of lemon juice and scatter with coriander. Serve with your choice of Indian bread and a dollop of yogurt.

We only had some pitta bread but it worked just as well. There was also some left over and we had it cold today for lunch – excellent too!

DSC06153

Glazed figs with mozzarella

In anticipation of all the juicy figs our new fig tree is going to produce I thought I would share this lovely recipe with you. Last Christmas we had this as a starter, an alternative to the usual curried parsnip soup. It is quick and easy and very tasty. It takes 20 minutes and serves 8 people.

Ingredients

  • 12 figs halves or quartered
  • 3tbsp sherry vinegar
  • 2tbsp caster sugar
  • mozzarella, 3 balls torn into pieces
  • 8 slices parma ham
  • 50g rocket

Method

  1. Put the figs cut side up on a baking tray. Mix the sherry vinegar and sugar then spoon over the figs. Grill for 6-8 minutes until glazed.
  2. Divide the figs between the plates then add the mozzarella, parma ham and rocket.
  3. Spoon over the cooking juices as a dressing.

Per Serving 276 kcals, fat 19g.

IMG_0914

The best tomato pasta in the world!

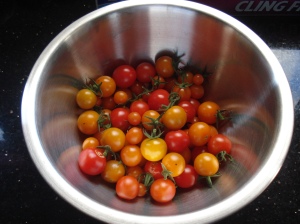
In any normal year, come August and September, Mr Mac and I usually take on an orange glow due to the amount of tomatoes we eat. Our staple diet is usually this simple pasta dish which originally came about as we had to find ways to use up all the tomatoes.

This year it was 21 September before we ate it for the first time and I have been waiting all summer to share it with you!

It takes minutes to prepare and you can leave it in the oven for an hour and go potter in the garden.

Ingredients

  • one big bowl of tomatoes
  • spaghetti
  • olive oil
  • balsamic vinegar
  • salt and pepper

Method

  • Fill a bowl with ripe tomatoes.


  • Wash and slice in half (or quarters if they are large).
  • Place in a roasting tray and add a generous helping of salt, freshly ground black pepper, a drizzle of olive oil and a glug of balsamic vinegar.


  • Place in an oven pre-heated to 180 degrees C until the mixture has reduced and the tomatoes have started to caramelise. This usually takes about an hour. Check after 30 minutes and give it a stir. It will look very watery but, trust me, it will reduce down to a gorgeous sauce.


  • Boil and drain the spaghetti and stir in the tomato sauce.
  • Enjoy!


We have tried adding garlic but I think this makes it bitter. Chorizo works well cut into small cubes and also using chilli oil instead of olive oil adds a nice bit of heat. However, I believe the tomatoes are always the star of the meal and this is definitely a case of less is more.


Raspberry and Amaretto Jam

This summer’s soggy weather obviously suited the soft fruit because we have had bumper yields. Over the last few weeks Mr Mac collected and froze almost 15lbs of raspberries.

After our third batch of making plain old raspberry jam I decided we should try something different. I remembered tasting raspberry and amaretto jam somewhere…I think it was at a craft fair or farmers market…and so we decided to use the last of the raspberries to experiment. The result is delicious.

Ingredients (makes approx 4lbs jam)

  • 1.3kg rasberries
  • 1kg sugar
  • 60ml amaretto
  • 1 tsp almond essence

Method

  1. Put the oven on to a medium heat and sterilise the jars and warm the sugar.
  2. Put the raspberries in the pan and warm through until they start to melt (if frozen) and the juice comes out.
  3. Pour in the sugar and stir until all the sugar has dissolved.
  4. Turn the heat up until you have a rolling boil and leave like this for 10 minutes being careful not to let it boil over the top of the pot (it takes weeks to clean the hob!).
  5. Pour some of the mixture onto a cold plate and leave to cool. If the mixture starts to “crinkle” when pushed it has reached setting point. If not boil again for 5 minutes and repeat the set test.
  6. Add a knob of butter to clarify and remove any scum from the top of the jam.
  7. Add the amaretto and almond essence, mix through and pour into hot jars.
  8. Seal the lids tightly and leave to cool before labelling.
  9. Enjoy!

Green Tomato Chutney

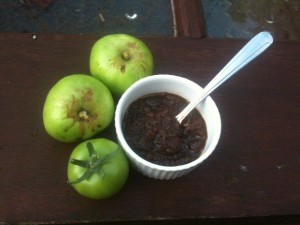
With the amount of rain and lack of sunshine this summer it looks like many greenhouse owners will have a glut of green tomatoes. Fear not, this tasty recipe transforms them into a delicious chutney that will see you through to next summer.

Ingredients

  • 2 ½ lb green tomatoes (1.25kg)
  • 2lb onions (900g)
  • 2 ½ lb cooking apples (1.25kg)
  • 1lb seedless raisins
  • 6 large cloves garlic, crushed
  • ½ tablespoon cayenne pepper
  • ½ tablespoon salt
  • 2 level dessert spoons ground ginger
  • 1lb 6oz soft brown or Demerara sugar (625g)
  • 1 oz pickling spice (25g) – optional
  • 3 pints genuine malt vinegar (1.75 litres)

What you will need

  • Small preserving pan
  • 8 x 1lb (450g) preserving jars
  • A mincer (or a food processor)
  • A string and some gauze

Method

Wash the tomatoes and cut them into quarters; peel the onions and quarter them; quarter and core the apples, leaving the peels on and keep them in water to prevent browning.

Using the medium blade of the mincer, mince the tomatoes and place them in the pan; next mince the onions, then the raisins followed by the apples, adding them all to the pan.

Now add the garlic, the cayenne, salt, ginger and sugar, blending everything thoroughly. Next, if using the pickling spice, tie it in a small piece of double-thickness gauze and attach it to the handle of the pan so that it hangs down into the other ingredients.

Now pour in the vinegar, bring to a simmering point, remove any scum from the surface, then let it simmer very gently for about 3 ½ hours without covering. Stir now and then, especially towards the end, to prevent sticking. It is ready when the vinegar has been almost absorbed, the chutney has thickened to a nice soft consistency and the spoon leaves a trail.

Pour the hot chutney into hot jars, filling them as full as possible and seal with a tight lid. Label the jars once the chutney is cold.

Store for at least three months in a cool dark place before using. This allows it to mature and mellow in flavour. It will be worth the wait!

The best blackcurrant jam

It used to be that Mr Mac made jam and I made chutney. Usually because Mr Mac has a short attention span and when I would still be up at 2am stirring the chutney, patiently waiting for the vinegar to evaporate and a “channel” to form, he would be giving out zzzzz’s, the jam finished hours ago.

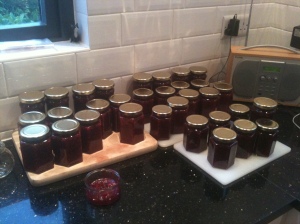
However, I’m not sure how it happened but I seem to be the one who makes the blackcurrant jam now (not the gooseberry, raspberry or strawberry though). So despite the awful weather, we picked a bumber crop of blackcurrants at the weekend – just over 6lbs from 2 bushes. Don’t quote me but I have a sneaky feeling blackcurrants have a strong Scottish connection and therefore thrive in the dreich, damp, drizzle!

Anyway, between us we have been making this jam for years. It gets rave reviews from everyone who tries it and it is so simple and quick to make although I must credit the Goddess that is Delia as the recipe is hers!

ingredients (for approx 9-10lbs)

  • 3lb blackcurrants with the stalks picked off and washed
  • 1.5 pints water
  • 3lb 12oz sugar

method

  1. Put the oven on to a medium heat. Sterilise enough jars for about 10lbs of jam. I put them in the dishwasher and then stick them in the oven.
  2. Measure the sugar and put it in the oven to warm it through.
  3. Put a couple of plates in the freezer (seriously – trust me!).
  4. Put the blackcurrants and water into a large pot and slowly simmer until the fruit is tender. You want to try and keep some of the fruit whole.
  5. Tip in the warm sugar and stir it in gently until it has all dissolved. Coat the back of the spoon and you will be able to see if the sugar has not dissolved.
  6. Once all the sugar has dissolved, turn the heat as high as it will go and boil the jam rapidly for 10 minutes.
  7. Get a plate out of the freezer and spoon some of the jam onto it. When the jam is cool, push it with your finger and if a crinkly skin has formed, it has set. If not, boil again for 5 minutes and keep doing the set test.
  8. Remove jars from the oven (remembering to wear oven gloves – just giving you the benefit of my personal experience) and I use a ladel to fill a measuring jug which makes it easier to pour the jam into the jars.
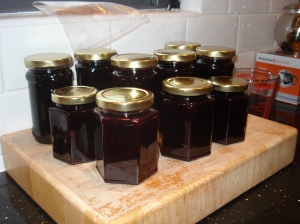
  9. Tighten the lids and leave to cool. Depending what type of worktop you have place the jars on a wooden chopping board if you have one. Granite, slate or stone might cause the jars to crack.

Two important points to remember. First, scoop some jam into a little ramekin so you can try some on toast or with creamed rice for your supper. Secondly, make sure you keep a Mr Mac (or equivalent) handy so when, in the middle of the night, the lids start to pop, you can send him downstairs to check it is not a burglar!
Enjoy!

Speedy suppers – mango chicken with couscous

Being quite far north in the UK we have the benefit of light nights in the summer. Already Mr Mac and I have still been out working in the garden at 9pm (just once though!).

At this time of year when there is so much to do outside, it is great to be able to work well into the evening. The last thing you want to do is spend hours in the kitchen making dinner.

I found a little booklet last week called 25 Quick Fixes – meals in 20 minutes or less! There are some great recipes for quick but tasty meals. I tried this one and it was delicious…and it definitely took less than 20 minutes to make.

Ingredients (serves 2)

  • olive oil
  • mini chicken fillets about 350g or just cut 2 chicken breasts into thin strips
  • ground cumin 2 tsp
  • chicken stock  300ml hot
  • couscous 150g
  • mango chutney 3 tbsp
  • spring onions 4 sliced into 3cm pieces
  • coriander a small handful roughly chopped

Method

  1. Heat 1 tbsp of oil in a wok or large frying pan. Sprinkle the chicken with the ground cumin and cook for a couple of minutes until lightly browned.
  2. Pour 200ml of the chicken stock over the couscous and leave to soak for 5 minutes.
  3. Add the mango chutney to the chicken, stir well and leave to bubble for 2 minutes.
  4. Add the remaining chicken stock and spring onions and cook for 5 minutes or until the chicken is cooked through.
  5. Fluff up the couscous with a fork, stir half the coriander through the couscous and the remainder through the chicken.
  6. Serve and enjoy!

For the health concious among you each serving has 505 calories and 10.4g of fat.

Tea Break – Lemon drizzle cake

This is a great cake for your afternoon tea break. The lemon gives you a hint that summer is on the way but in cake form it is the perfect comfort food. Slice it up and keep it in a sealed container for up to a week……if it lasts that long!

Ingredients

  • 175g unsalted butter, softened
  • 175g caster sugar
  • Finely grated zest of 3 lemons
  • 3 medium eggs
  • 175g self-raising flour
  • A pinch of sea salt
  • A splash of milk (optional)
  • 200g icing sugar
  • 75ml lemon juice

Method

  1. Grease a large loaf tin, 1 litre capacity and line the base and sides with baking paper.
  2. Put the butter and sugar in a large bowl and beat together until pale and fluffy.
  3. Add the grated lemon zest and then beat in the eggs one at a time, adding a spoonful of flour with each (to stop the mixture curdling).
  4. Sift the remaining flour and salt into the mixture and fold in lightly using a large metal spoon. Add a little milk, if necessary, to achieve a good dropping consistency.
  5. Spoon the mixture into the tin, smooth the top and place in an oven pre-heated to 170C / Gas Mark 3. Bake for 45-50 minutes, until a skewer inserted in the middle comes out clean.
  6. Put the icing sugar in a bowl, add the lemon juice and stir together until smooth. Leaving the hot cake in the tin, use a fine skewer to make holes over the top of the cake, going quite deep but not all the way to the bottom. Spoon the lemon icing slowly over the cake so it all soaks in.
  7. Leave in the tin until cool, then turn out and serve in slices.

The easiest rice pudding ever!

I love rice pudding but I always felt the amount of effort was not worth it (I must have a rubbish recipe).

Recently, we were having friends over for dinner, one of who was dairy and gluten intolerant. This caused my brain to ache slightly. Our brief was to stick to vegetables and rice (I forgot to mention they were both vegetarian). My first instinct was rice pudding but then I realised it was full of cream, butter and milk which were off the menu!

One evening Mr Mac and I had a thai curry for dinner. I always misjudge the amount of sticky rice to make (the instructions on the side of the packet are in cups – I think I use mugs!) and we end up with enough to eliminate third world famine. The other annoying thing is we only ever use half a tin of coconut milk. The other half goes in the fridge and then gets thrown out after a month when I find it again!

Can you see where I’m going with this? Mr Mac suggested trying to make a rice pudding using the leftover rice and coconut milk.  It took us a while to get it right but we impressed our friends and now feel smug about not wasting food.

It is worth playing around with it to suit your own taste but this is what we do:

Ingredients (for 2 people)

  • Rice – whatever the packet suggests for a portion per person. We have used pudding rice and also leftover thai sticky rice and both work equally well.
  • 200ml (or half a tin) of coconut milk
  • 3 tablespoons of brown sugar (or to taste)
  • 1 vanilla pod
  • 3 or 4 cardomams
  • sliced mango for a garnish

Method

  1. Cook the rice as per instructions on the packet, drain and leave in a bowl.
  2. Put the coconut milk, sugar, cardomams (I bash them to get the seeds out but put the whole lot in the pan ) and vanilla pod (slice it open to release the seeds but put the whole lot in the pan) in a pan and warm through gently until all the flavours have infused into the milk.
  3. Once you are happy with the taste of the milk, strain it through a sieve over the rice. WARNING do not do what I once did and strain the milk over the sink only realising what a prize idiot I was when the last of the milk disappeared down the plughole!
  4. Mix the rice and milk together and eat straight away or leave until later and warm it up in the oven. Some sliced mango over the top finishes it off nicely.

You can mess around with other spices like cinammon or add nuts, and orange and lemon zest.

The beauty of this dish is it can be eaten straight away, eaten cold or made well in advance of guests coming leaving you time to be an attentive host.

It is also naturally free from dairy, eggs, soy and gluten so can be eaten by virtually everyone (unless you don’t like rice or coconut).

Enjoy!

Winter is back – so here is a great soup to keep you warm!

Lemon scented spicy chicken broth

I discovered this recipe just before Christmas last year and it is a great winter warmer, perfect for a cold day in the garden – especially days like today when it is snowing!

I would suggest making double the amount of infused stock and freeze half. That way you can rustle up a second batch in super quick time – especially if you have leftover roast chicken!

Ingredients

  • 1.5 litres chicken stock
  • 5cm peeled and chopped ginger root
  • 2 garlic cloves, peeled and sliced
  • Thinly pared zest of two lemons
  • 1 long red chilli, seeded and chopped
  • 200g leeks, washed and thinly sliced
  • 200g carrots, peeled and finely diced
  • 100g Arborio rice
  • 225g boneless, skinless cooked chicken breast, cut into small pieces
  • 2 tablespoons lemon juice
  • Salt and freshly ground black pepper

Method

  1. Place the stock, ginger, garlic, lemon zest and chilli into a large saucepan. Bring to the boil, cover and simmer for 30 minutes.
  2. Sweat the carrots and leeks in a little oil until the leeks have softened. Add the rice grains then strain over the infused stock.
  3. Bring to the boil and cook for 15 minutes, or until the rice is cooked.
  4. Add the chicken and the lemon juice, salt and pepper and cook gently for 5 minutes.
  5. Check seasoning and eat!